What is a virtual VOR? In this case it is a fix/waypoint in a GPS that can be made to work like a VOR for instrument training.
Overview
- Why make and use a virtual VOR?
- Virtual VORs in the Garmin GNS 430
- Virtual VORs in the Garmin GTN 650
- Pros and cons of virtual VORs
Why make and use a virtual VOR?
Why would you want to make and use a virtual VOR for instrument training? Well there a variety of reasons:
- You don’t have a VOR nearby
- The VOR is down (U/S unserviceable or out of service)
- The VOR is congested with traffic
Whatever the reason, we will go through how to set it up in both the Garmin GNS 430 and the Garmin GTN 650 GPS and list some pros and cons of virtual VORs.
You can also check out the short video – How to make & use Virtual VORs for Instrument Training using Garmin GNS 430 and GTN 650 GPS
Garmin GNS 430 Virtual VORs
Step by step instructions on how to make and use a virtual VOR in the Garmin GNS 430
- Select a suitable fix nearby (or make a user waypoint)
- In selecting a fix, take into account approach corridors, use of the fix (is it part of an instrument approach etc.)
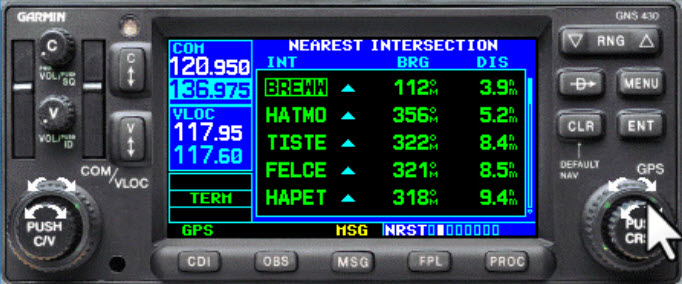
- Use Large Knob to select NRST group
- Use Small Knob to select NRST Intersection
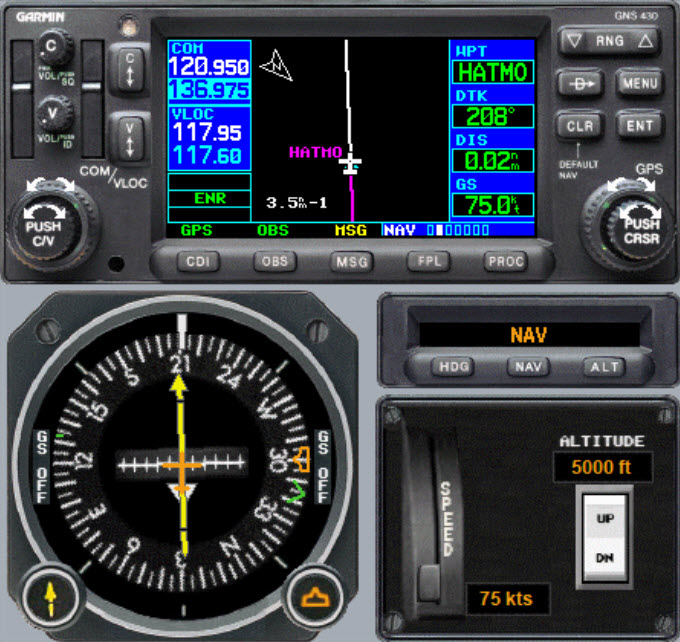
- Use the bearing and distance information to select a suitable intersection by pressing the Small Knob to enable cursor mode, use the Large Knob to scroll through the options and pressing Direct-To Button and then press the ENT Button twice to create a course toward the fix
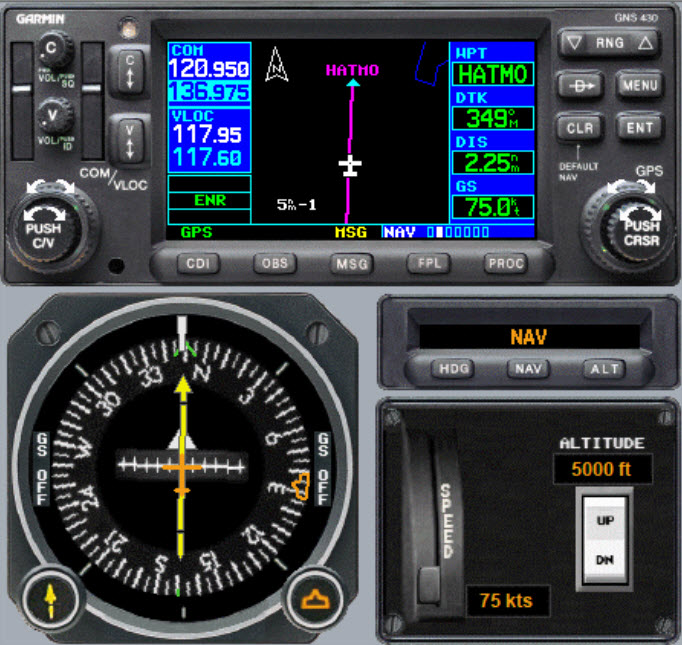
- Navigate towards the fix
- Once you have selected Direct-To, you can adjust the CDI needle to your desired track and start navigating to the fix
- Take down the hold instructions
- In this example, “Hold North East of the HAMTO ‘VOR’ on the 030 bearing“
- Use whatever method you like to determine hold entry – in this case Teardrop
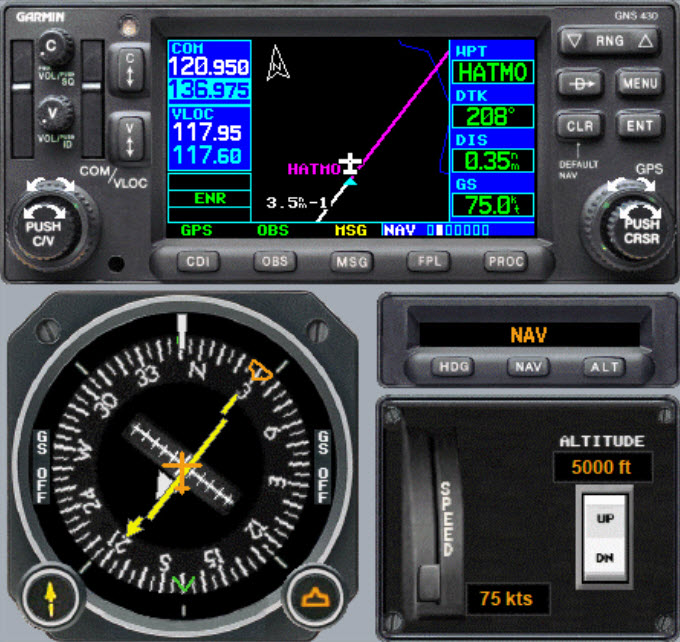
- Cross fix & set OBS mode
- Press OBS Button – OBS mode is what allows this GPS fix to now work like a VOR with radials
- Select the ‘radial’ using the HSI OBS Knob or the Dialog Box that might appear (depending on your remote HSI setup)
- Set the inbound course to be the reciprocal of the hold radial – in this example 210
- Start a timer and turn for entry type
- In this example, 30 degrees left of holding radial = heading 360 degrees for one minute
- After one minute, turn inbound, intercept the inbound course (OBS mode ‘radial’)
- Fly over the virtual VOR, observe the ‘flag-flip’ from a TO indication to a FROM indication and fly the hold as you normally would – it works just a like a VOR but without any cone of confusion
Garmin GTN 650 Virtual VORs
Step by step instructions on how to make and use a virtual VOR in the Garmin GTN 650
- Select a suitable fix nearby (or make a user waypoint)
- In selecting a fix, take into account approach corridors, use of the fix (is it part of an instrument approach etc.)
- Use Home Button to go to Home Page
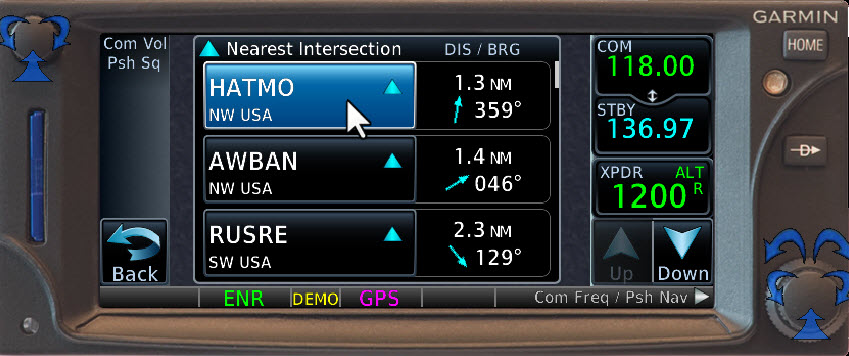
- Select Nearest
- Select INT
- Use the bearing and distance information to choose and then select a suitable intersection (you can scroll through using Up and Down arrows)
- Press the Direct-To Button and then press the Activate to create a course toward the fix
- Navigate towards the fix
- Adjust the CDI needle to your desired track and start navigating to the fix
- Take down the hold instructions
- In this example, “Hold North East of the HAMTO ‘VOR’ on the 030 bearing“
- Use whatever method you like to determine hold entry – in this case Teardrop
- Cross fix & set OBS mode
- Use Home Button to go to Home Page
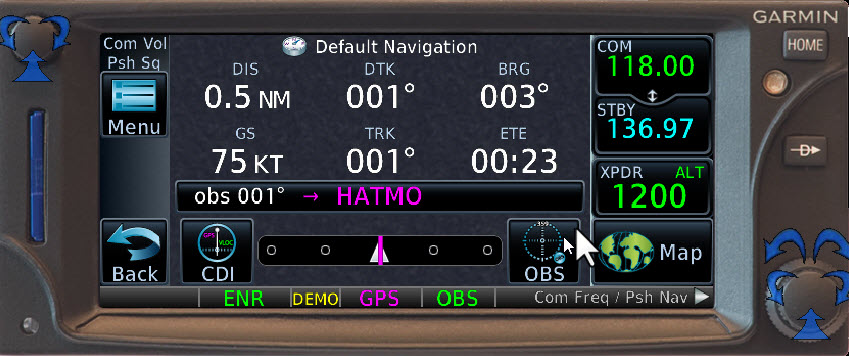
- Select Default NAV
- Select OBS – OBS mode is what allows this GPS fix to now work like a VOR with radials
- Select the ‘radial’ using the HSI OBS Knob or the Dialog Box that might appear (depending on your remote HSI setup)
- Set the inbound course to be the reciprocal of the hold radial – in this example 210
- Start a timer and turn for entry type
- In this example, 30 degrees left of holding radial = heading 360 degrees for one minute
- After one minute, turn inbound, intercept the inbound course (OBS mode ‘radial’)
- Fly over the virtual VOR, observe the ‘flag-flip’ from a TO indication to a FROM indication and fly the hold as you normally would – it works just a like a VOR but without any cone of confusion
Virtual VORs Summary
The pros and cons of making and using a virtual VOR
| Pros | Cons |
|---|---|
| No ‘Cone of Confusion’ so easier to navigate close to the virtual VOR | No ‘Cone of Confusion’ – make sure students know how to deal with this with the real VOR |
| No tune & ID so quicker setup | No tune & ID – student maybe forgets to do this on the real VOR |
| Can practice anywhere, even a user-generated waypoint can become a virtual VOR | Different avionic inputs – make sure student gets real VOR training too |
| No signal obstruction from terrain so can practice at lower altitudes | |
| Less traffic/noise concerns as can practice away from congested VORs | |
| Can still practice if if the real VOR is out of service |
Feedback
If you tried using virtual VORs, how did it go? Do you have any other virtual VOR tips and tricks to share? Use the comments form below, and thanks for your feedback.


